Generate ICSE reports with ICSE grading feature by Fedena 3.3

ICSE (1)

In our last post on ICSE grading system feature by Fedena 3.3, we have discussed about the configuration that you need to do before you start using the feature. Once you’re done with the configuration, the next step requires you to enter the marks of students. The feature also allows you to generate reports based on the marks of students. Read the article and find out more on generating ICSE reports.

How to generate ICSE Reports

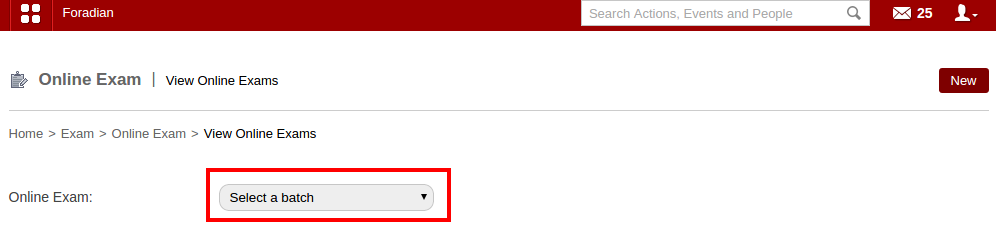
When you login to your Fedena account, you are required to go to ‘ICSE Reports’ in ‘Examination’.

1
As you can see in the screenshot above, the Reports Center has four options:

Generate Reports: You can generate a report on the student scores entered. Next, you need to select the particular course for which you want to generate the report.

23
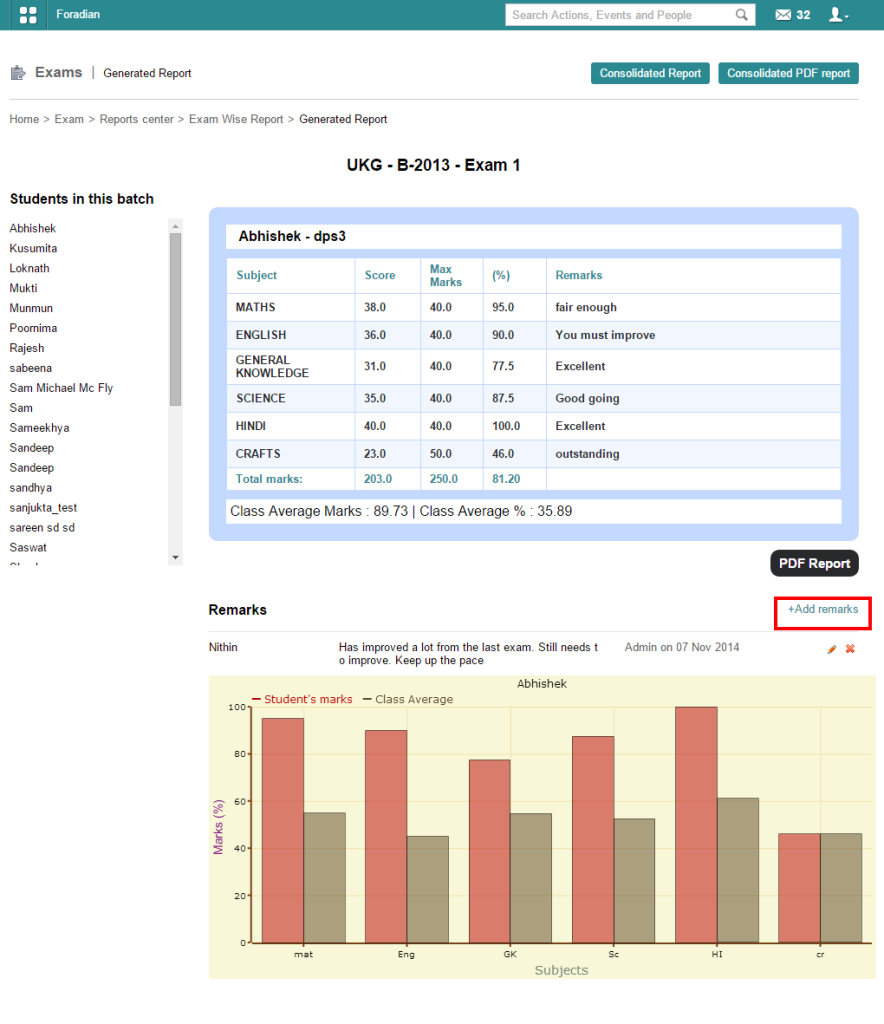
View Student Report: To view the report of particular students, you can use this option. It gives you the score card of students.

4
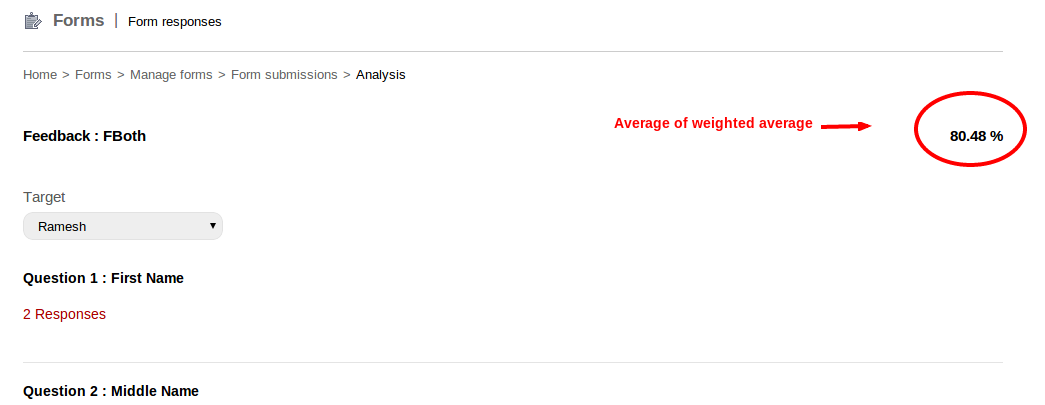
As you can see, this is a report card of a particular student. Likewise, you select other students from ‘Students in this batch’ as marked in the screenshot. A ‘Term’ is used in most ICSE institutions under which the examinations are conducted. Most schools have two terms- Term 1 and Term 2 exams.

Subject-wise Report: Similarly, you can also generate report of students based on subject.

5
Consolidated Report: Get a consolidated report of all the subjects together for students.

6
The consolidated report of students in the particular course and batch.

Note: Generating report is highly flexible and it offers you the option to generate reports on multiple combinations in subject-wise and consolidated report. This means, you are allowed to generate reports based on terms, on internal marks alone or external marks or a combination of both, etc.

Introducing the all new ICSE grading system with Fedena 3.3

ICSE

The earlier version of Fedena offered different types of exam grading like the GPA, CWA and CCE. But the new version of the software, Fedena 3.3 has introduced a new core feature called the ICSE grading system which will allow institutions following the ICSE grading pattern with exams and courses. Before using this core feature, you need to know the feature well. Today, we will cover the configuration part that you need to do to use the ICSE grading system feature for your institution.

ICSE Grading- The configuration process

Before you start using the ICSE grading system for examinations in your institution, you need to do some configuration. For this, you need to first go to ‘General Settings’ where you will select ICSE as the grading system.

1

As you can see in the above screenshot, ‘ICSE’ has been selected as one of the grading systems. Before proceeding to the next step you need to upgrade all the relevant existing courses to ICSE grading system.

2
3
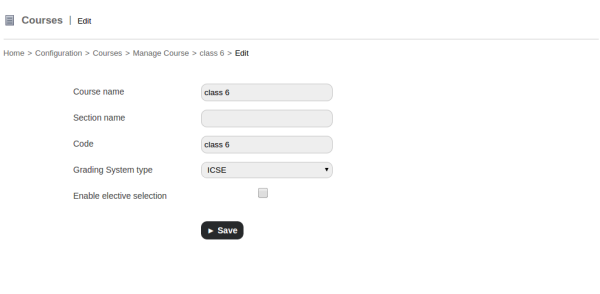
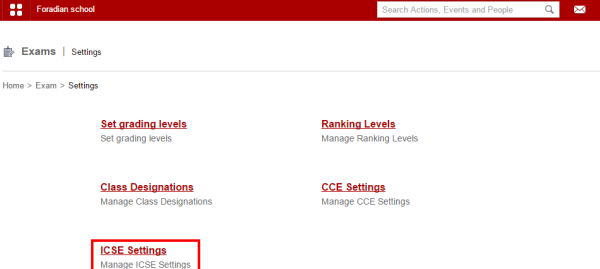
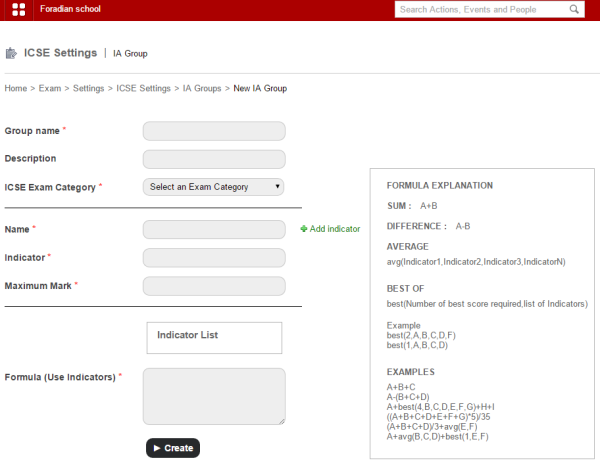
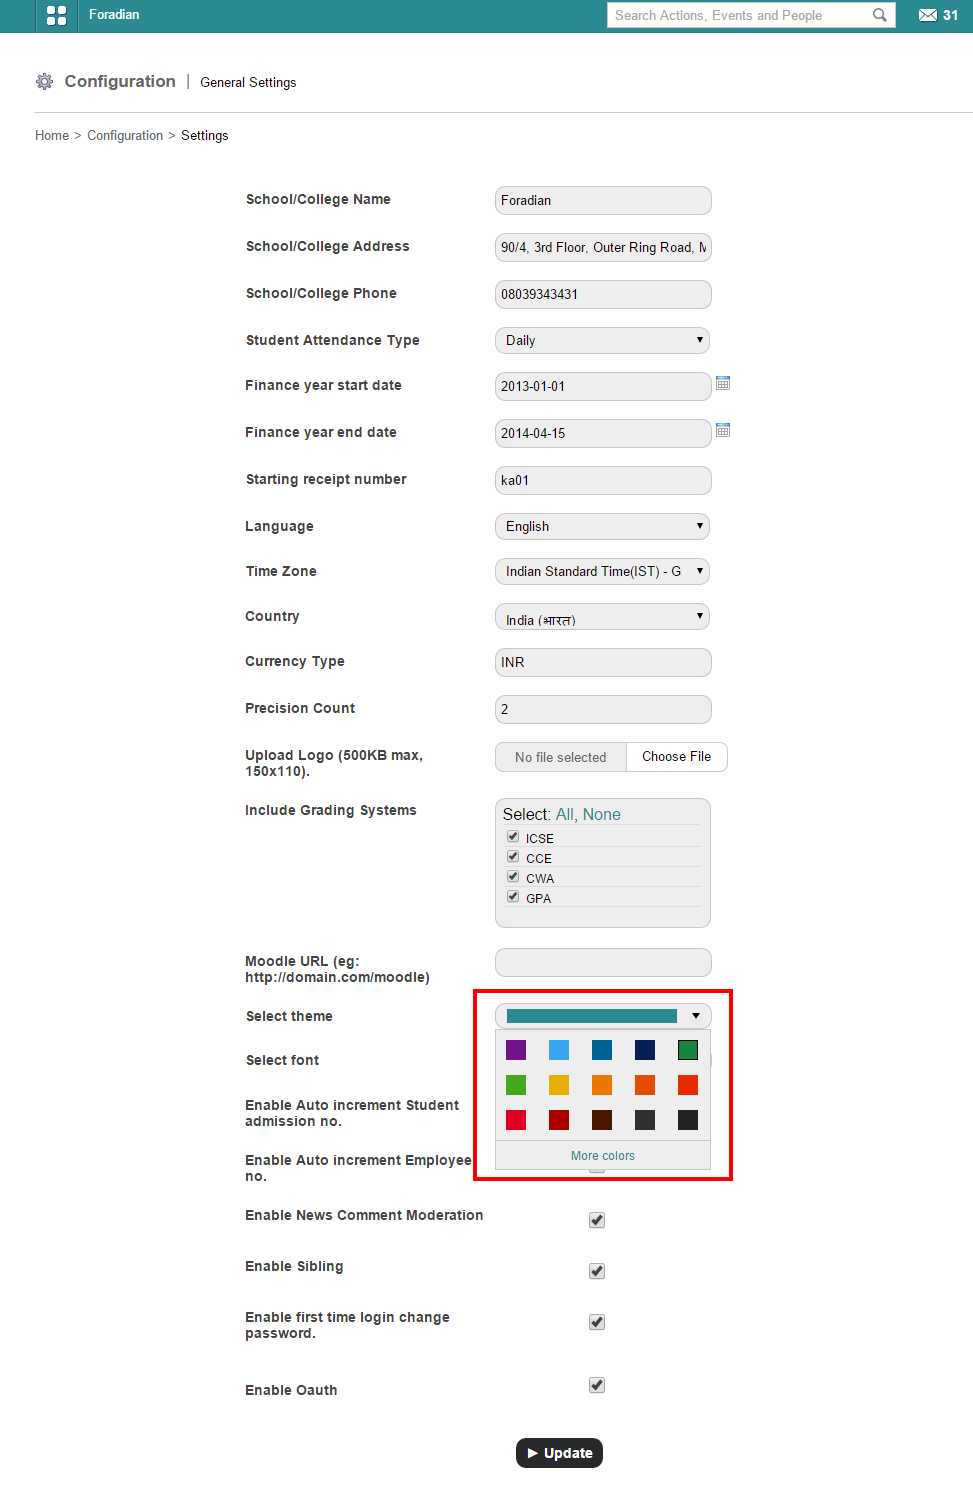
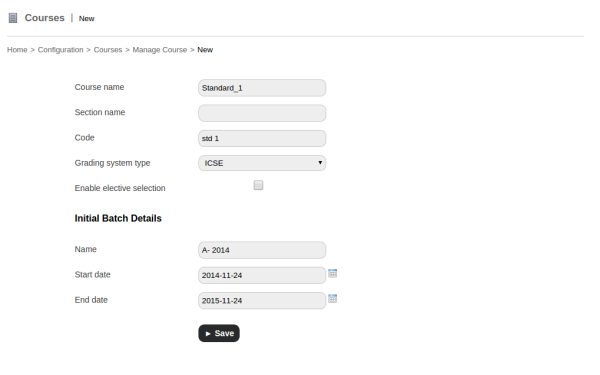
For all the other new courses, use ICSE as the opted grading system as shown in the screenshot.

Then comes the part of adding relevant ICSE settings from the Settings part of examination.

4

‘ICSE Settings’ will take you to its page where you need to do the configurations.

5

ICSE Exam Categories: This section will let you create new ICSE exam categories. Clicking on the ‘New’ option will let you create new exam categories.

6

Fill in the necessary information to create the new exam category.

ICSE Weightages: The next step is to create the ‘ICSE Weightages’.

7

Provide with the EA or External Assessment weightage and IA or Internal Assessment Weightage along with option of co-curricular activities (if co-curricular activities are part of any of the weightage.)

Assign Weightages: The weightages created above has to be assigned to respective batch and for this, you need to select the respective batch and also the subject.

8

Internal Assessment Groups: Create a new internal assessment group for internal assessment exam.

9

Create the group by filling up the necessary information. Make sure you provide the indicator and the formula. Description of all formula is given in the right-hand side of the page, as shown above in the screenshot.

Assign IA Group: Once you are done creating IA group, the next step is to assign the IA group.

10

Assign IA group and you are done with ICSE exam configuration.

In the next article, we will be talking about the ICSE Reports in detail.

The All New Remarks Module with Fedena 3.3 to Provide Remarks to Students

Remarks_Module

Introducing a new module with Fedena 3.3, Remarks let you provide remarks for each of the student on the basis of performance in different subjects or some common remarks on individual student on any particular exam conducted. The module also allows administrators to provide custom remarks on the students. To know more on the Remarks module, go through the article below.

The Remarks module

The Remarks module can be used in three major forms- as common remarks, subject-wise remarks and custom remarks.

How the three major forms of the module works

A subject teacher or a tutor of the particular batch has the privilege to provide remarks.Subject teachers can add/modify remarks for those subjects which they teach whereas the tutor can add/modify for all subjects in that batch. For this, you need to go to ‘Exam Management’ in ‘Examination’. Select the particular course and the respective exam as well as the subject to provide remarks for each of the student on the particular subject.

4

As you can see, individual marks are given to each of the student in the respective subject.
2.png

Remarks can also be added for a particular subject from Exam Wise Reports and Student Transcript Page.
To check the report on remarks based on exams, you have to go ‘Exam Wise Reports’ in ‘Exam’ and select the batch and exam group.
3
The screenshot above shows the subject wise marks of the particular student. For ‘Common remarks’ on the particular students, you have to click on ‘+Add remarks’ as marked in the screenshot, and add your respective remark for the student. ‘Common remarks’ are helpful when you want to provide with extra remarks for any students on the particular exam the student attended.

When you are looking forward to provide with custom remarks, you need to go to ‘Remarks’ in ‘Academics’. There is an option to ‘Add custom remark’ which when selected will ask you to select the particular course and batch.

4
For custom remarks, you have to provide the name under whom the remarks are to be published, in the ‘Remark by’ box. Provide with a ‘Subject’ as well before filling up remarks for each of the student. ‘Custom remarks’ are those remarks which are general comments on any student on the overall performance.

PDF report on the remarks can also be extracted.

The new Color Theme plugin by Fedena 3.3

Fedena-color-theme

The new Fedena 3.3 comes along with a lot new features to provide the best of user experience. Today, in this article, we will feature a brand new plugin that has been introduced with the new version of Fedena, called the Color themes. Earlier version of the software allowed only six color themes, which has been extended to more options. This allows our users to choose a color theme of their choice from the color picker. Read the article for more details on the plugin.

Choosing Color Themes and font

When you login to your Fedena account, go to ‘General Settings’ in ‘Settings’.

1
Here, as you can see in the screenshot above, you have the option to choose color from the available colors for theme. For more colors, select ‘More colors’.

2
Choose any color of your choice.

For font, you need to go to ‘Select font’ option in the ‘General Settings’ page only.

3Selecting font is a completely new feature in the color theme plugin. Choose from the 7 font styles available from the list.

Introducing Fedena 3.3

Fedena new release

As a part of our effort to provide our customers with the best of experiences of Fedena, we have come up with a new updated version of Fedena 3.3. This new version promises you a quality management software for schools and colleges with richer user features. Follow the release note below to know more about the latest version.

Write to us for your valuable feedback and any further information at info@fedena.com.

Core Features

Force deletion of student in case of data dependencies
Fee Headwise Report
Remarks Module
ICSE Grading System
Multiple Fee Payment and Particular-wise Fee Payment

Addons

Sales in Inventory
Interswitch Payment Gateway Enhancements
Color Themes

Language Updates

Added support for Gujarati and Turkish

Issues Fixed

E-mail

  • Scheduled job fails for E-mail Alerts
  • Remove “Send Email” option for parent

Reminder

  • Page load time is very high during reminder creation

Users

  • Style issue in employee profile page

Students

  • If no student is present in a batch then show flash message inside the elective subject assignment page
  • Selected date changes upon encountering an error in Student Admission page
  • Student Additional Details record does not get deleted when a student is deleted
  • Batch name is not shown in archived student profile page

Dashboard

  • ‘Administration’ tab is not shown for user with ‘Manage course/batch’ privilege

Online Exam

  • Online exam for which end date has elapsed could be published
  • Online Exam option should not be shown in parent login

Applicant Registration

  • Unclear flash message if the batch does not contain all the subjects as chosen in Applicant Registration page
  • Same student could be allotted a batch more than once with same admission number in Applicant Registration page
  • Change  the name ‘Download’ to ‘View attachment’ and open the attachment in a separate tab in View Applicants page

Attendance

  • Marking attendance prior to admission date is allowed
  • No SMS is sent and reason is blank in the email in case of rapid attendance
  • Duplicate batch name is shown in Attendance Register page

Custom Import

  • Unable to import exam score in Custom Import
  • Guardian custom import has no validation

Reports

  • In Examwise report, ‘PDF report’ button to be renamed as ‘Consolidated PDF report’
  • Teacher has no permission to view CSV report for Grouped Exam report

Events

  • During event creation for employees, “Select a Course” label is shown for department selection

Finance

  • Salary account details is not shown in Finance Compare Transaction page
  • Remove the title ‘Delete’ from the Master Fee Category listing table
  • In Finance Category page, sort order changes to ‘oldest-first’ after a category is created
  • ‘Payslip Date’ to be changed to ‘Payslip Period’ in Employee Payslip page, including PDF
  • Inactive payroll category is shown in View Payslip page
  • ‘Amount to pay’ is shown wrong for student fees
  • Discount is shown incorrectly while viewing fee collection
  • Discounts of former students is shown in the Discount list page
  • Total fees in the fee structure PDF is shown wrong
  • In ‘Finance reports’, transaction accounts from unassigned plugins are shown for new schools
  • Negative value is shown for ‘Amount to pay’ in the fee defaulters page after fees is paid
  • Reason is not shown in the PDF report of rejected payslip
  • Student category cannot be changed if unpaid fees exists for that student

Hostel

  • Error 500 is thrown after allocating student to hostel
  • Even though room rent is more than 9999.9999, unpaid hostel fees in student profile is shown as ‘9999.9999’ only

Transport

  • Even though bus fare is more than 9999.9999, unpaid transport fees in student profile is shown as ‘9999.9999’ only

Inventory

  • GRN PDF does not show ‘Grand Total’ value
  • Alignment issue in indent creation page
  • Items from deleted store are shown in search results

Mobile

  • Mobile View Fee Status does not show any information

Library

  • Alignment issue in book edit page

Online Payment

  • Unable to repay after a reversal

General

  • Parent can access all the pages that student can access
  • Should not allow to select elective subject from parent login

Apps

  • Unable to access apps in case of Hindi & RTL languages

Examination

  • Multiple exam score entries are shown for the same student and same exam

Previous Release notes:
Fedena 3.2
Fedena 3.1.1

Fedena 3.1
Fedena 3.0

The New Analysis and Reports Feature in the Form Builder Plugin

Reporting

We had discussed about how you can create and publish feedback forms using the Form Builder plugin in our last article. Today, we will see how the new Analysis and Reports feature works in the Form Builder plugin.

The main objective of this new feature of analyzing and extracting reports is the fact that at times, you might need to analyze the feedback to come to conclusion on the performance of any teacher. This is when you need the Analysis and reports which will help you do the required analysis and extract necessary reports.

How can you extract reports and do analysis of feedback forms?

For this, you need to go to ‘Manage forms’ in the ‘Forms’ section.

analysis_1


Choose the particular form you want. Once selected, it will take you to the particular form submission page.

analysis_2

You can get a preview of the particular form you want using the ‘Preview’ option. When you select ‘Consolidated report’, you go to the ‘Consolidated report’ page.

analysis_3

You get a consolidated report on each of the target along with all the categories under which the target is rated in the feedback form. Moreover, a detailed report on the weightage can also be obtained as shown in the screenshot above.

For analysis, select ‘Analysis’ and go to the page to get a detailed analysis for each of the target.

analysis_4

A detailed analysis as you can see from the screenshot above. Moreover, you can export the result of form submission in CSV format also!

Note:

There is something called ‘weightage’ which allows you to enter weight for the options available under each question in the feedback form. It will show the ‘weight’ or the amount of importance each option carry. Here, in the above screen, as you can see ‘weightage’ is mentioned as ‘wt’. You have to mention the weightage during the time of form creation.


10 (1)


Weighted average = Σ(wt)i(n)i/Σ(n)i

Wt = Weightage

n = Number of submissions for the particular option

Σn = Total number of submissions for the questions


11


Average of weighted average = (Σ((wt)q*100)/(max*(wt)q))/nq

(wt)q = Weighted average of questions

nq = Number of questions

Create and publish feedback forms using Form Builder plugin

Form-builder


With Fedena 3.2, you can now enjoy a very new and exciting plugin called the Form Builder. One of the biggest advantage of this new plugin is that it helps you create feedback sessions in your institution. Create and publish feedback forms in few simple steps which are mentioned as you go through the article. Read on to find how you can create and publish feedback forms easily.

Create feedback forms as an admin or a privileged employee

When you login to your Fedena account, go to ‘Forms’ in ‘Collaboration’. From there, you need to go to ‘Create form templates’ where you need to create the new form template. 

form builder_1

Drag whatever fields you want in your form template from the left column to the right one as shown in the above screenshot with the arrow. ‘Save template’ if you want to use the same template again in future. Else, ‘Use’ button will help you to use the template for the particular feedback session you want. Don’t forget to give a name to the form at ‘Form name’.

You have to create the form, put in all necessary information and for which, you have to go to ‘Form templates’ and select the respective template.


form builder_3


Fill in all necessary information to complete creating the feedback form. Once you are done with creating the form, you can go to the next step.

form builder_2


Before publishing the form, you have to select whether its a feedback form and also the recipients from the particular department and batch. Also, you can select if the feedback is meant only for students or parents or both.

When a student login to take part in the feedback

The students who are assigned to take part in the feedback session, will get message. Once selected, it will help in viewing the message.

form builder_4


Click on the link to go to the form and fill it up.

form builder_5


Once the form is filled, click on the ‘Submit’ and it will go the admin.

Login as admin to see responses for the feedback session

The admin can see the responses by navigating through ‘Manage Forms’. Click on the particular form to go to the form submission page.

form builder_6


You can extract the responses as CSV file or go for ‘Analysis’ also. Thus, an easy and smart way to conduct a feedback session at your institution.


Re-arrange and randomize questions in Online Exams with Fedena 3.2

Rearrange-Questions
Conducting various type of exams often require you to frame questions and rearrange them for each question paper. And this task is without any doubt, much hectic, rearranging the questions for all the students. But with the question re-arrangement and randomize option, you don’t have to spend your time doing the same yourself. Read the article and know how you can use the options for examinations.

How to do it

Arranging questions takes place in two types- rearranging it yourself and using the randomize option.

In case the questions are arranged manually

Login to your Fedena account and go to ‘Online Exam’.

1

Select ‘View Online Exams’ and go to the respective page to select the particular online exam where you want to make the new updates with arrangement of questions.

2

Select the particular online exam to do the modifications. Once you select the particular online exam, it will take you to the particular online exam detail page.

3

The ‘Rearrange Questions’ option lets you rearrange the questions according to you.

Using the ‘Randomize’ option

When you don’t rearrange questions manually, use the ‘Randomize’ option.

4
Just select the ‘Randomize’ option and the order of the questions will change every time a different student appears the exam. Thus, a perfect help for conducting different type of exams.

Classroom allocation made easy with Fedena 3.2

Untitled-2

Earlier version of Fedena didn’t allow its users to allocate special rooms for different classes. Hence, developing classroom allocation feature was something on high priority and finally, the feature has been released in the newer version of Fedena 3.2. Classroom allocation allows you to create separate classroom for conducting classes.

The earlier version of Fedena allowed you to view the timetable which showcased what subject is to be taught, who is the assigned teacher and the time schedule for which the class is allocated. But, in the earlier version, the concept of allocating classroom and building for the particular class to be taken was missing. With Fedena 3.2, you can now know where the class is supposed to be taken. Allocate building and classroom too, for the particular class to be conducted. Read the article and find how you can create and allocate classroom.

How Does the Feature Work

Login to your Fedena account and go to ‘Timetable’ in ‘Academics’.

1

Select ‘Class Room Allocation’ and go to the ‘Class Room Allocation’ home page.

2
Select ‘Manage Buildings’ to add new building and new classrooms to allocate to respective classes.

3
Create a new building and rooms by filling in the necessary information. You have to name the new room and also mention the capacity of each room in the building. Add any number of new room with the help of the option ‘Add field’. Once you are done with creating new building and rooms, you can go to ‘Allocate’ in the ‘Classroom Allocation’ home page.

4

Select the allocation type- Weekly or Date specific. Also, select the particular timetable to which you want to allocate the classroom.

5

The above screenshot shows how to allocate classroom in case the allocation type is weekly. Select any of the day as well as the building and the particular room and drag it to the subject, as shown by the arrow.

6

This above screenshot shows you how to allocate classroom when the allocation type is date specific. The rest you have to do the same with selecting the building as well as the room and drag it to the respective subject, just like you have done in the scenario shown above.

Note: The main difference between the two types of classroom allocation is that, when the weekly format is chosen for a given period of time (suppose from 1st November to 30th November), the timetable range along with the assigned building and classroom for each of the day in the week will be same throughout (in this case, from 1st November to 30th November), unless it is overridden by the date specific classroom allocation. Date specific classroom allocation can override the weekly classroom allocation for the particular date.

The New Change in Class Timing Interval with Fedena 3.2

timing
Earlier version of Fedena allowed the users to set class timings, only at 5 minutes interval. Hence, class durations were set at the multiple of 5, i.e, 5 minutes, 10 minutes, 20 minutes, etc. But with Fedena 3.2, the class timings can be set for any time limit and it may not  necessarily be a multiple of 5. Thus, being an user, you can now set the class timings for any time period- a class can be of 41 minutes, 52 minutes, 23 minutes, etc. Read on the article and find out how you can set class timings with the new changes.

How to do

Go to your Fedena account and go to ‘Timetable’ in ‘Academics’.

SS1
Select ‘Set class timings’ to go to ‘Manage class timing sets’ page.

SS2

Go to ‘Class timing sets’ and select the particular class timing from the list.

SS3
Class Timings’ will take you to the ‘Manage class timings’ page.

SS4
Click on ‘Add’ button as shown in the screenshot above.

SS5

You can set the class duration of any time limit. It need not have to be in the multiple of 5. The class duration can be of any time duration, be it 15 minutes, 18 minutes, 42 minutes, etc.

Fedena 3.2 Brings you the Import Question Feature in Online Exam

Blog-graphics1

In the last article, we have talked about the new updates and features in the Online Exam plugin with the newer version of Fedena 3.2. Today we take up a new feature in the Online Exam plugin which is called the Import Question. Read on the article to find out more about the Import Question feature.

Import Question Feature

The basic point of the Import Question feature is that it allows you to import questions from any last exam of a particular batch. And it can be done both in terms of exams which are ‘General’ in nature as well as of those based on any particular subject. To check out how the feature works for exams and questions which are ‘General’, login to your account and go to ‘Online Exam’ in ‘Examination’. Go to ‘View Online Exams’.

import_1.png

Go to ‘View Online Exams’ and select the batch for which you want to make the changes in the question paper and import questions.

import_2.png

Select the particular exam you want to modify.

import_3.png

The ‘Import Questions’ when selected will help you with importing questions from previous exam.

import_4.png

Select the question you want to import from the panel on the left and as it shows up in the right, click on ‘Import’. But you have to fill in the marks for the question as well before you ‘Import’ the question. And you are done with importing questions for exams which are ‘General’ in nature.

In case of exams which are subject based, questions will be subject specific only. To import questions for this kind of exams, you have to first select the particular exam for which you want to do the import question option.

import_5.png

As the screenshot shows, you have to select the ‘Course’, ‘subject code’ and then select the question you want to import. As mentioned earlier, you have to fill in ‘Marks’ allotted to the question before importing the question.

Any good or important question from previous exam you want to be part of a current exam, you can now do it easily with Import question feature.

New Updates in Online Exam Plugin with Fedena 3.2

Blog-graphics-Exam-Plugin
The new version of Fedena 3.2 has a lot to offer to its customers for a better user experience. And some major changes and updates have been done to facilitate such experience, Today, in this article, we will focus the changes and updates that have taken place in the Online exam plugin. Read on to find out the new updates.

Update 1: In the earlier version of Fedena, the online exam plugin allowed only exams which were general in nature and were mostly batch specific exam. That means, exams were only related to a particular batch and were not subject specific.

With the newer version of Fedena 3.2, exams can be created based on subjects as well. Hence, it becomes easy to create separate exams based on subjects.

online_1.png

When you select ‘Subject Specific’ exam, you need to select the particular batch to which you will be asked to select the subject as well as the students who are supposed to appear for the exam.

online_2.png

Note: When you select an elective subject, the students who have the particular elective subject will be able to appear for the exam.

Update 2: There has been a new update in the ‘Exam Format’. Earlier version of Fedena didn’t allow you to go for descriptive type questions. Only objective questions for exam was allowed. But Fedena 3.2 allows you to conduct exam with descriptive type question/answer pattern.

online_3.png

When you select the ‘Exam Format’ as ‘Hybrid’, it allows you to frame subjective type questions. And it also requires you to assign evaluators who will be checking the answers for the questions.

online_4.png


As shown in the picture above, you can assign as many evaluators you want. Only employees can be assigned as evaluators. Employees who are assigned as evaluators can see the link to the page for evaluation under ‘Academics’ when they login to their account.

online_6.png

This is how an evaluator marks an answer sheet of a student.

Update 3: When you select ‘Objective’ as ‘Exam Format’, the earlier version of Fedena offered constant number of options for answers. Fedena 3.2 now allows you variable number of options as answers. That means, you can have different number of options as answers for different questions.

online_5.png

Add as many options you want as answers. Plus, you can remove any option if you want to.

Update 4: Students, in the earlier version of Fedena, were not allowed to see their marks of exams they have attended. Only admin could see the marks. But with Fedena 3.2, students can not only see their marks, but check their answer sheet as well.


online_7.png

A lot more features on online exam will be published in the coming weeks. Stay tuned.